
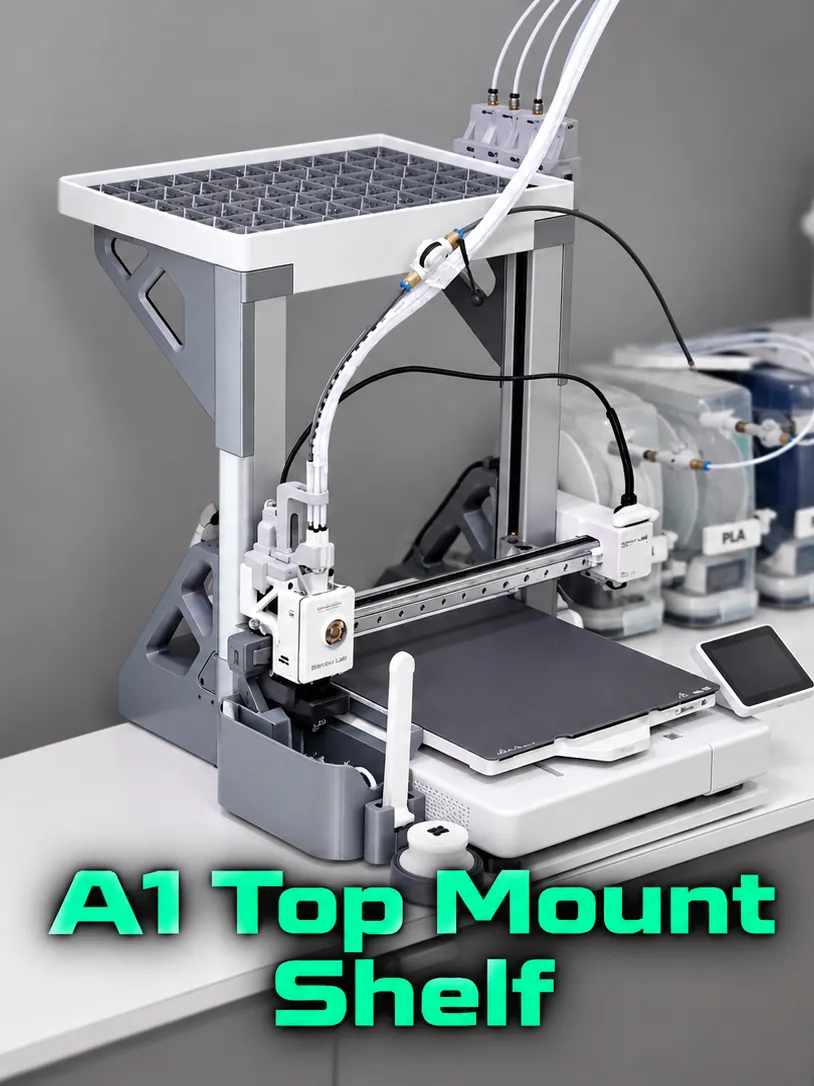
Model Overview & Print Notes
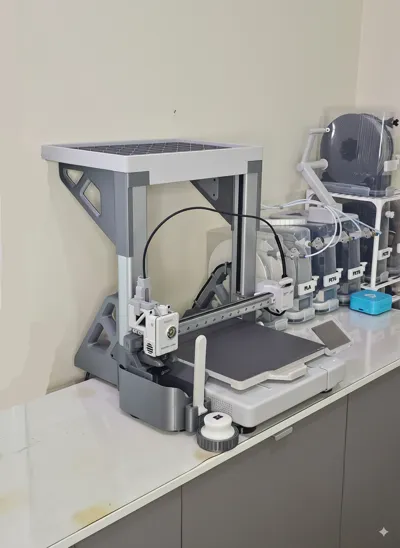
Top Mount Tray for the A1.
This is a tray that is mounted to the top of the Z-Axis gantry to hold whatever you may need. I wanted to save some counter space and have a place for a couple of rolls and the tools I use frequently. There is a Gridfinity base that fits in the tray. It is slightly undersized at 41.75mm so that my bins would press fit to reduce their vibration.
I hope you might find it useful and or something to build off of to suite your needs.
~~Updated Tray Models to allow for Exposed Gantry Screw Heads Found in Newer Models~~
Assembled Dimensions:
Updated - Original - Outside - Width = 385mm, Depth = 265mm, Height = 33mm Inside - Width = 365, Depth = 255mm, Height = 20mm
Updated - Medium (Fits AMS 2 Pro) - Outside - W =390mm, D = 285mm, H = 33mm Inside - W = 380, D = 285mm, H = 20mm
Updated - Wide (Fits SUNLU S4) - Outside - W = 530mm, D = 295mm, H = 33mm Inside - W = 520, D = 285mm, H = 20mm
Tray Parts needed:
- 6 - M3*16 Screws
- 6 - M3x4x5mm Brass inser
Gridfinity base: (Optional)
- 4 – M3*8 Screws
- 4 – M3 Nuts
Also print the 2 Z-Axis stiffeners from the AMS Lite Top Mount for A1. https://makerworld.com/en/models/92486-ams-lite-top-mount-for-a1?from=search#profileId-100105
Before Printing, if it’s been a while since you re-tensioned your belts, you may want to consider it even if you are not getting the "resonance frequency error. The tray parts are tall and printed on the diagonal. Bed adhesion is also key for the tray so that the dovetail joint mates correctly (the joint is a tight fit).
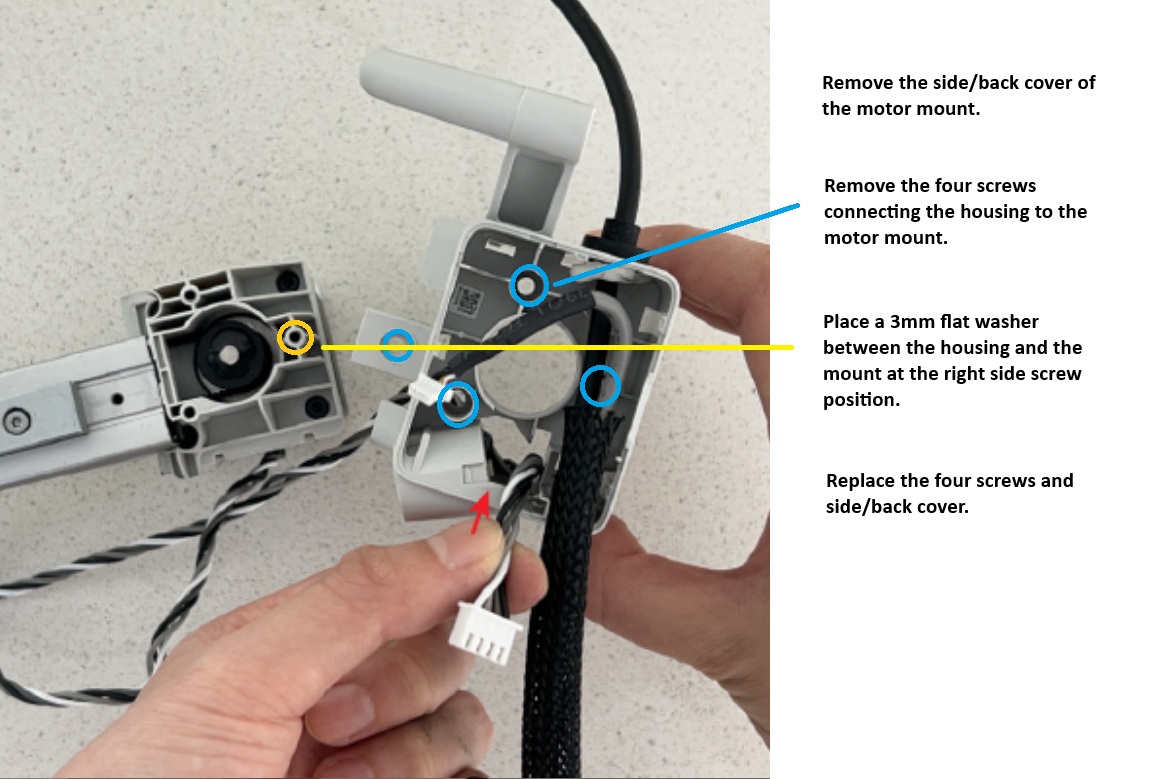
Included is a Gantry clearance test model. Print and place on the right gantry frame to check the clearance between the x-axis motor housing along the height of the gantry upright. If your motor housing rubs against the brace, you can shim the housing to creae clearance. There is also a tray joint test model.
Assembly:
- Press the heat inserts into the braces.
- Mount the braces to the gantry. Fit will be tight.
- Join the two tray halves. (This is where the bed adhesion/warping matters. If it binds, consider applying a little light lube to the dovetail or very gentle heat to the grove, to ease things along. )
- Insert the “pin” (dove tail wafer) into the back underside to join the two tray sides. The wide and medium tray version require two. They are located in the shelf brace profile.
- Slide the tray onto the top of the gantry from the front. Start with the back of the tray elevated so that you can start the tray along the underside of the gantry and then it will rotate down as you push forward.
- Start all of the screws into their inserts before tightening.
After installing, it would be good to recalibrate!
If you find this project useful, here are a few others you may like.






💬MakerWorld Community Comments(273)
★MakerWorld Original Reviews