
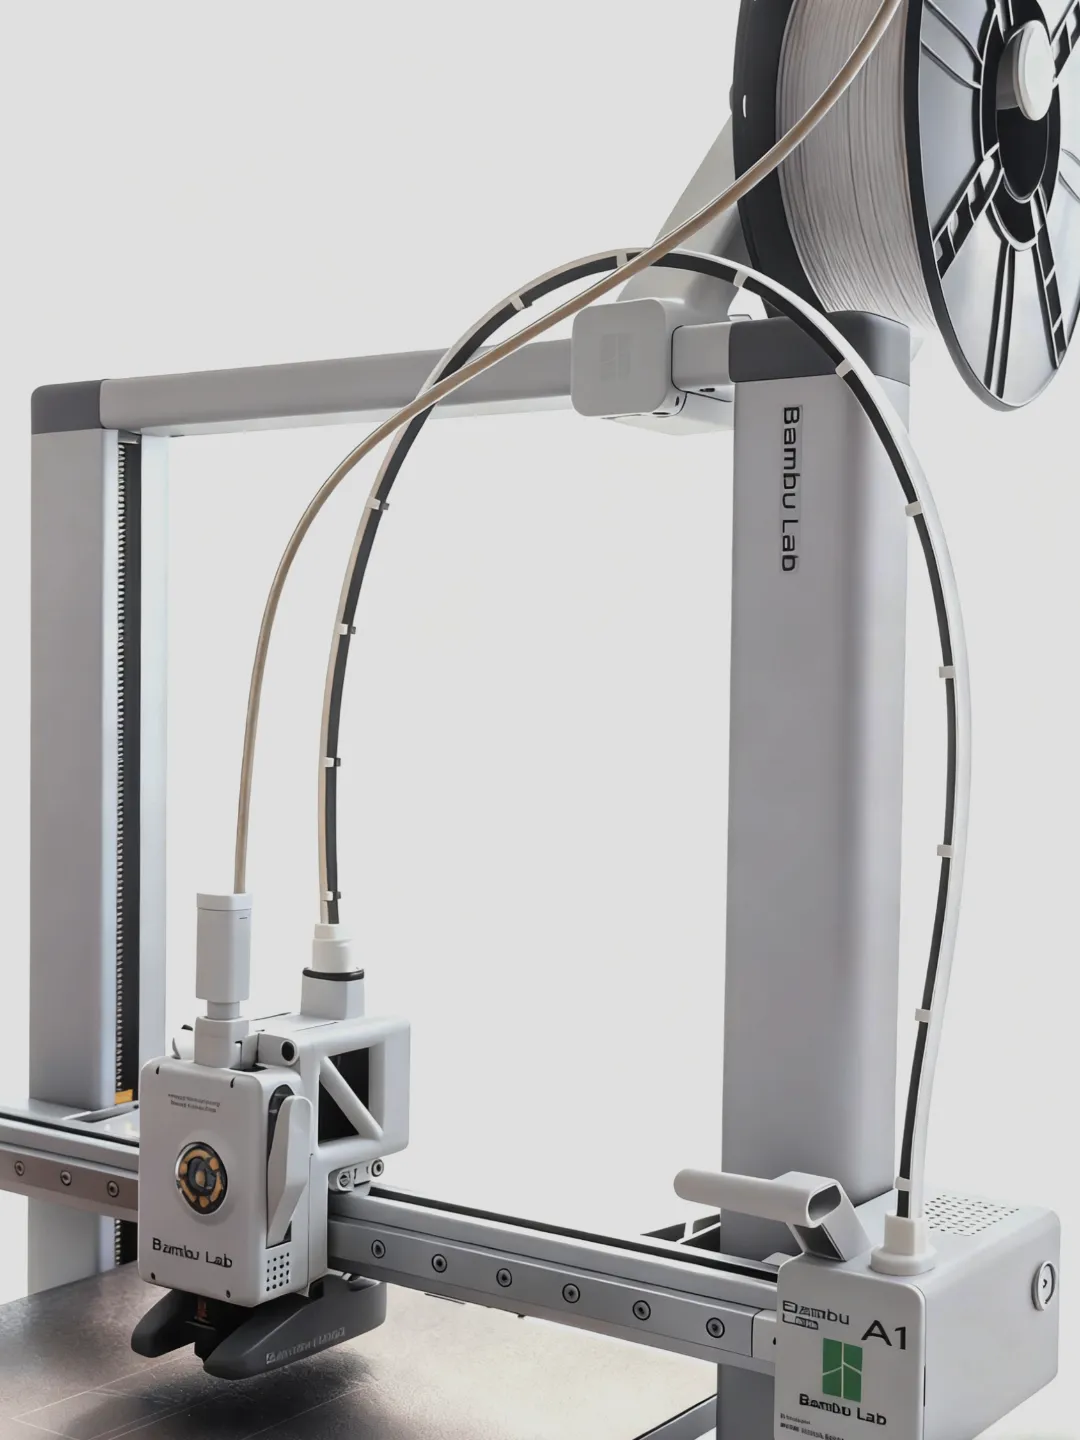
Model Overview & Print Notes
A1/A1mini Cable Strain Relief
Design Concept
Addressing the shortcomings of existing cable strain relief models in terms of aesthetics and practicality, I have created a completely new design. Through precise measurements and multiple iterative tests, this solution achieves a balance of clean and unobtrusive aesthetics just enough structural strength and minimal interference with the machine. The final result is this minimalist cable management solution built specifically for the A1/A1mini series.
Specifications
| Parameter | A1 Version | A1mini Version |
|---|---|---|
| Total length of strap | 666mm | 550mm |
| Strap thickness | 1.0mm | 1.0mm |
| Strap width | 7.0mm | 7.0mm |
| Connector slot dimensions | 7.1×1×5mm | 7.1×1×5mm |
| Left connector height | 16.4mm | 16.4mm |
| Right connector height | 13.6mm | 13.6mm |
Product Advantages
- ✨ Ultra Lightweight: Extremely low weight, barely impacts machine motion performance
- 🎨 Minimalist Aesthetic: Compact form factor that blends seamlessly with the device's overall design
- 🔒 Reliable Securing: Snap-fit design ensures cables stay stable and do not come loose
- 💰 Cost and Material Efficient: Very low filament requirement, significant cost savings for printing
- 🛡️ Long Lasting: Flexible structural design with excellent fatigue resistance
Printing Guide
Support Strategy
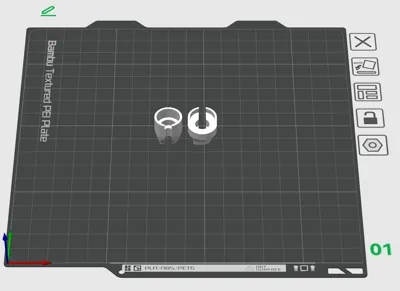
- Print as one piece: Use inverted external supports, easy to remove and leaves internal surfaces smooth
- Print as separate parts: Delivers even better surface appearance
Material Selection
- [Recommended] PETG: Excellent durability and flexibility
- [Alternative] PLA: Be aware of ambient humidity and long term brittleness issues
- [Required] Preprocessing: Ensure the printing plate is clean and filament is dry
Parameter Recommendations
- Layer height: 0.12mm for improved surface quality
- Adhesion: Enable Brim to prevent warping
- Temperature: Adjust based on the characteristics of the filament
🛠️ Installation Guide
1. Preparation and Post Processing
- Visual Inspection: Check that the model is complete and that there is no residue inside the connector slots
- Sanding: Check for print remnants or burrs on the strain relief strap. If necessary, lightly sand with sandpaper to ensure the surface is smooth and unobstructed
- Support Removal: After printing, wait until the model has fully cooled to room temperature then carefully remove all supports using flush cutters or similar tools

2. Installation Steps
Step 1: Cut the main strain relief strap
- Locate the widest segment on the strain relief strap
Cut along the center seam the pre-designated Z-seam position to separate the strap into two sections


Step 2: Install the left side printhead side connector
- Pre-trim: Take the section of the cut strain relief strap intended for the printhead side and trim the portion near the connector to approximately 12mm-20mm from the first snap fit you may install first to test fit before final trimming
- Confirm orientation: Make sure the opening of the connector faces toward the rear of the printer
Pre-assemble: First assemble this connector to the strain relief strap before attaching it to the cables. Note: If it does not insert smoothly, lightly sand the end of the strain relief strap until it slides in easily


Step 3: Secure the cables
- Run the partially assembled strain relief strap along the cable path and snap all snap fits into place one by one
- Important: Leave the last snap fit unsecured for later length adjustment


Step 4: Install the right side connector and finalize installation
- Install the remaining connector: Attach the connector on the other end of the strain relief strap to the right side of the printer, again ensuring the opening faces the rear
- Set the length: Neaten the cables and determine the proper length of the strain relief strap, ensuring the cables remain naturally slack, not too tight or too loose
- Trim and secure: Cut off any excess length then insert the right side connector into its 5mm deep mounting slot to lock it in place
- Complete installation: Finally, snap the previously reserved last snap fit into place to finish the full installation
- Adjust the strap: If the curve of the strain relief strap is not smooth after installation you may manually adjust the curve to achieve a gentler bend for the cables


Reminder: Do not forcefully bend cables or apply excessive force during operation. Ensure all snap fits and connectors are fully seated to avoid interfering with normal printhead movement
❓ Frequently Asked Questions
Q1: What to do if supports are difficult to remove?
A: Make sure the model is fully cooled, use flush cutters or similar tools to carefully pry from the gaps. Cooled material becomes more brittle making removal easier
Q2: How can I improve difficult assembly of the connector slots?
A: Ensure the slots are clean and free of residue, and that print dimensions are accurate. If necessary, lightly sand the end of the strain relief strap or the interior of the slot
Q3: There are scratches or marks on the cables after installation?
A1: Poorly printed snap fits or uncleaned support remnants can leave burrs that will damage cables if forced into place. It is recommended to clean and sand down any burrs or defects inside the snap fits after printing. Minor marks on the cables may appear after installation
Version Update Log
Update Date | Major Update Details |
|---|---|
| 2025-08-02 | Optimized connector opening dimensions, significantly improves installation experience |
| 2025-07-22 | Released lower strain relief version for A1[Download Link] |
| 2025-07-17 | Optimized print parameters, overall improvement to surface quality and support performance ⚠️ Note: Supports adhere tightly to the model, use caution when removing |
| 2025-07-16 | Optimized snap fit dimensions and connector structure, increased Brim width to improve adhesion |
| 2025-07-01 | Added A1mini compatible version thanks to @米隆 @cloud for testing support 📌 Left and right connectors are interchangeable with the A1 version |
| 2025-06-28 | Reinforced connector structural strength, improved installation stability |
💬MakerWorld Community Comments(730)
★MakerWorld Original Reviews