
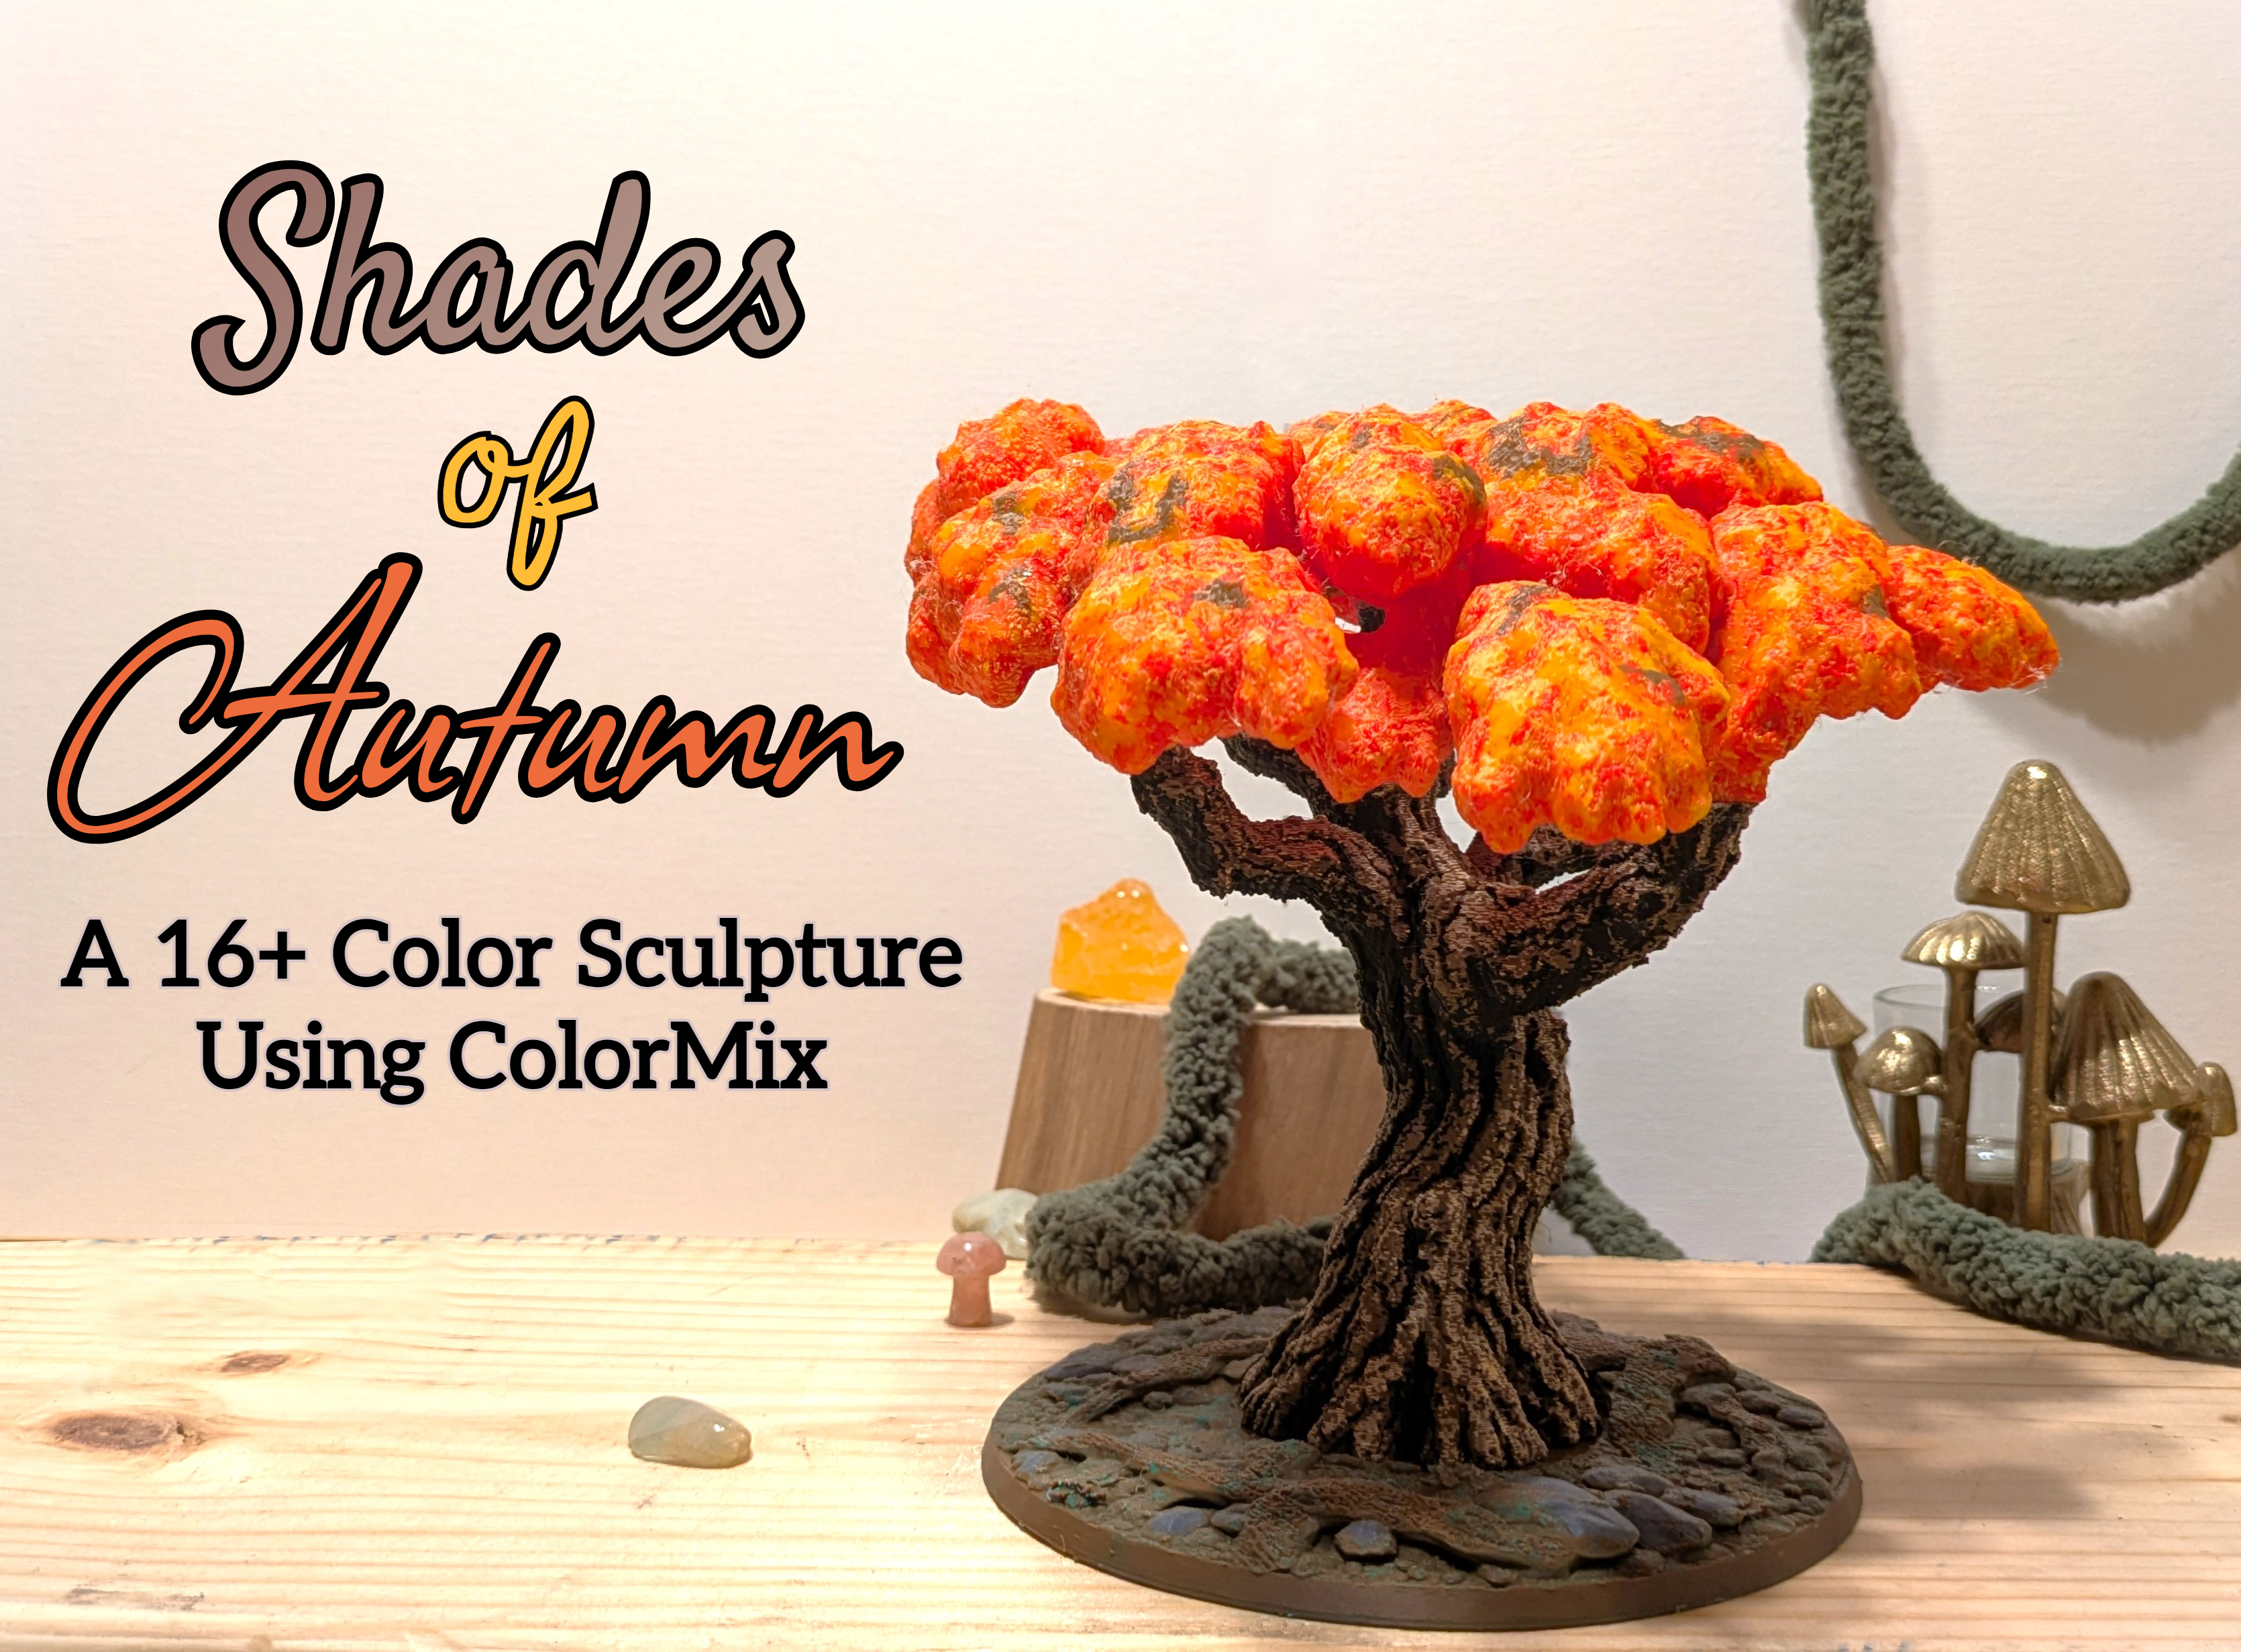

Shades of Autumn - a 16+ color seasonal display using ColorMix

Download, slice and print this model in the MakerSpell app — available on Android and Windows. Get the app
Model Overview & Print Notes
Overview Shades of Autumn is a tree sculpture I designed to show how far 3D printing has come and how capable modern printers are. It uses ColorMix/FullSpectrum to create over 16 colors in one model while using only 8 filaments. Please do not hesitate to point out any issues while printing! This is a display model that shows the season of fall. Unlike other ColorMix models that use CMYK filaments to create a large selection of vibrant hues, I designed this model around mixing neutral and standard colors (such as black, brown, and red) to create different dark and light shades between filaments. I also designed it for printing on a 4 toolhead printer like the CORE One INDX 4T, Snapmaker U1, and Flashforge Creator 5. The model shown in the pictures was printed on my Snapmaker U1. Colors Required All colors: ⚫ Black 🔘 Gray 🟤 Brown ⚪ White/Beige 🔴 Red 🟠 Orange 🟡 Yellow 🟢 Green Colors for each part: Trunk: ⚫ Black 🟤 Brown ⚪ White/Beige 🟠 Orange Base: ⚫ Black 🔘 Gray 🟤 Brown 🟢 Green Canopy: 🟤 Brown 🔴 Red 🟠 Orange 🟡 Yellow Printing Instructions Before you continue, there are a few things to keep in mind. I had some trouble moving the color painting between different software. I could not get the color data to load properly into Bambu Studio or PrusaSlicer 3. I can confirm that it loads correctly in PrusaSlicer 2.9.6 and Snapmaker Orca with the corresponding file, but I cannot guarantee that other slicers (like regular OrcaSlicer) will work. Another important note is that the canopy is split in half to make printing easier and reduce the amount of supports. I have included the whole version, but I don't recommend using it. I will say that support removal for the canopy is a pain. If you have a printer with more than 4 toolheads (like the XL+ or INDX 8T), I recommend using a dedicated support material. Importing Instructions Due to the way PrusaSlicer handles virtual extruders, I was unable to find a good way to merge all the project files. Because of this, there are four included .3MF files. To open each file while preserving the assigned colors/virtual extruders, click File → Open Project and then select the desired .3MF file. For Snapmaker Orca, I was able to properly merge the projects, so you only need to open a single project file. Print Settings Recommendations Setting Recommended Value Layer Height 0.08mm – 0.15mm Infill 10% - Adaptive Cubic Supports Yes - Auto Generate - Organic Walls / Perimeters 2 Material PLA I really want to emphasize the importance of using low layer heights, especially for ColorMix/FullSpectrum models. In the image above, the base on the left was printed with a 0.2 mm layer height, while the one on the right was printed at 0.08 mm. It’s pretty clear which one looks better. Using a lower layer height doesn’t just improve the model’s resolution. It also allows the different filaments to blend together more smoothly, creating better transitions between shades. Assembly Instructions Step 1: - Press the trunk onto the base. If desired, superglue the sides of the peg to join the 2 parts. Step 2 - Glue the two canopy parts together. Step 3 - Press the canopy onto the top of the trunk. Make sure to align the square pegs properly. If you would like, superglue the sides of the pegs. I chose not to glue it so I can remove it for future additions. How I Designed This So, a little bit of a backstory before I get into the whole process. I am more of a "functional parts" guy, meaning my designs are primarily CAD models rather than art pieces. I usually use Onshape to make things for myself, and I hardly ever share my designs online (the only other model I have published is a replacement part for a DeWalt vacuum ). However, I do occasionally use Blender for minor projects. When I saw this contest, I thought, "I should make a design to submit for kicks and giggles." So, I started making this in Blender, and a couple of days later, here we are. Step 1 - Modeling the Basics The first thing I did was model the basic parts in Blender. I made the trunk, the base, and the leaves without adding too much detail (I'll explain why in Step 3). For whatever reason (I don't remember why), I modeled the three parts separately. This created a tiny hiccup that I fixed in the next step. Step 2 - Adding Connectors After finishing the parts, I imported them into (please don't exile me) Tinkercad. Why Tinkercad? Mainly because it lets you modify STLs much more easily than Onshape does. I added the square notches and inserts and fixed the issue of the parts not fitting nicely with each other. After that, I imported the models back into Blender to smooth everything out. Step 3 - Adding Texture I next added 3D texture to the models using BumpMesh by CNC Kitchen. The tool makes quick work of adding texture to large models, saving a ton of time. The downside is that it increases polygon count on the models by a large margin. I would 100% recommend checking it out. The link is at the bottom. For anyone wondering, on the trunk I used the "Wood 1" texture. Step 4 - Adding Color This is where the fun began. I first used Blender to texture the models (as in, adding color), and then imported them into Texture2Paint. This let me convert GLB files with built-in color data into printable 3MF files. In addition to Texture2Paint, I also used the Prusa ColorMix Shading Tool and OrcaSlicer ImageMap to add more color variation. I then did some minor color painting cleanup to get everything ready to print. Step 5 - Printing I finally prepared the model for printing by choosing the appropriate settings, orientation, and other parameters, then printed it! Step 6 - Fixing Minor Issues After my first attempt at printing the base, I realized the bottom face had gotten messed up during texturing. This ruined the first layer, so I had to fix it. For a single-color model, the easiest fix would be cutting a small layer off the bottom of the object, however, splitting or simplifying models in the slicer erases the added color painting, which was something I didn't want to redo. What I did instead was create a large, flat cylinder that I merged with the base, giving it a smooth bottom surface while keeping the color painting. Tools Used BumpMesh by CNC Kitchen https://bumpmesh.com/ Texture2Paint by EllsworOpan https://ellsworopan.github.io/Texture2Paint/ ColorMix Shading Tool by Prusa Research https://prusa3d.github.io/ColorMix-Shading/ OrcaSlicer ImageMap by sentientstardust-dev https://github.com/sentientstardust-dev/OrcaSlicer-ImageMap
💬Baskı İncelemeleri & Yorumlar(0)
★4.9 / 5.0· Başarılı Baskı