
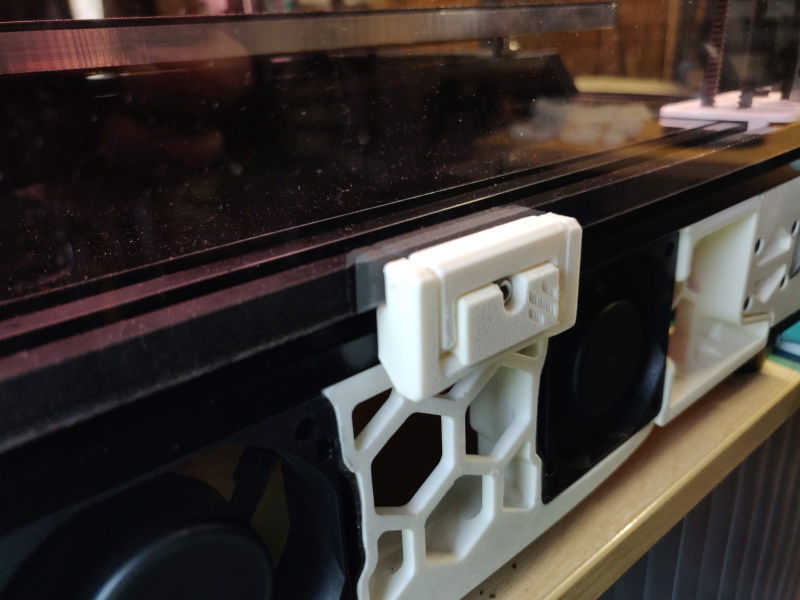

Voron 2.4 Filament Latch (or any 2020 extrusion)

Download, slice and print this model in the MakerSpell app — available on Android and Windows. Get the app
Model Overview & Print Notes
Printable quick release latch for panels on 2020 extrusion This is originally inspired by a youtube video - https://www.youtube.com/watch?v=6p7M18oPn3k A recent review video on YouTube by Maple Leaf Makers Another user did a review of the clips on YouTube - Best way to mount panels to your 3D Printer? Quick Release Panel Clip Mod So why did you do it? I wanted a variant with filament hinges I found it didn't put quite enough pressure on the panel and my attempts to modify the cad failed Decided the best way to understand it was to design it Wanted adjustable "pressure" and thought using a sweep on the latch was a nice solution making the most of the flex of ABS Wanted everything as a parameter so I could tune it Build plate density, a bonus of using a filament hinge is that the area used for each hinge is much smaller 45 instances on a 250 buildplate Hardware 3.0mm-5.5mm - m3x12 6.0mm-8.0mm - m3x16 8.5mm - m2x20 The process Cad attempt one failed, just modified surfaces to create a filament variant but adjustment beyond that failed Cad attempt two failed, created a traced version copying the dimensions but again couldn't get a reliable adjustment Cad attempt three of the cad sketch made as built was finally onto something, took until v45 before I had something that seemed to fulfil my requirements, then after thinking overnight revisited earlier designs and finally hit RC at v68 (18 actually printed) Final design and thankfully discovered sheeter (now defunct sadly) which allows me to produce many stls based on parameters Assembly voron-parts/Assembly.gif at main · richardjm/voron-parts (github.com) Print parts (do test prints to ensure you're happy with the fit before going wild) Assemble to correct orientation Insert two short filament lengths connecting middle hinge to hinge body, one from each side Insert one long filament length connecting middle hinge to outer hinge The filaments are a tight-ish fit on the hinge arms but loose in the pivot intentionally Connect to frame using with hammer nut or spring loaded nut with either m3x12 or mx16 depending on size of hinge printed