Download, slice and print this model in the MakerSpell app — available on Android and Windows. Get the app
Model Overview & Print Notes
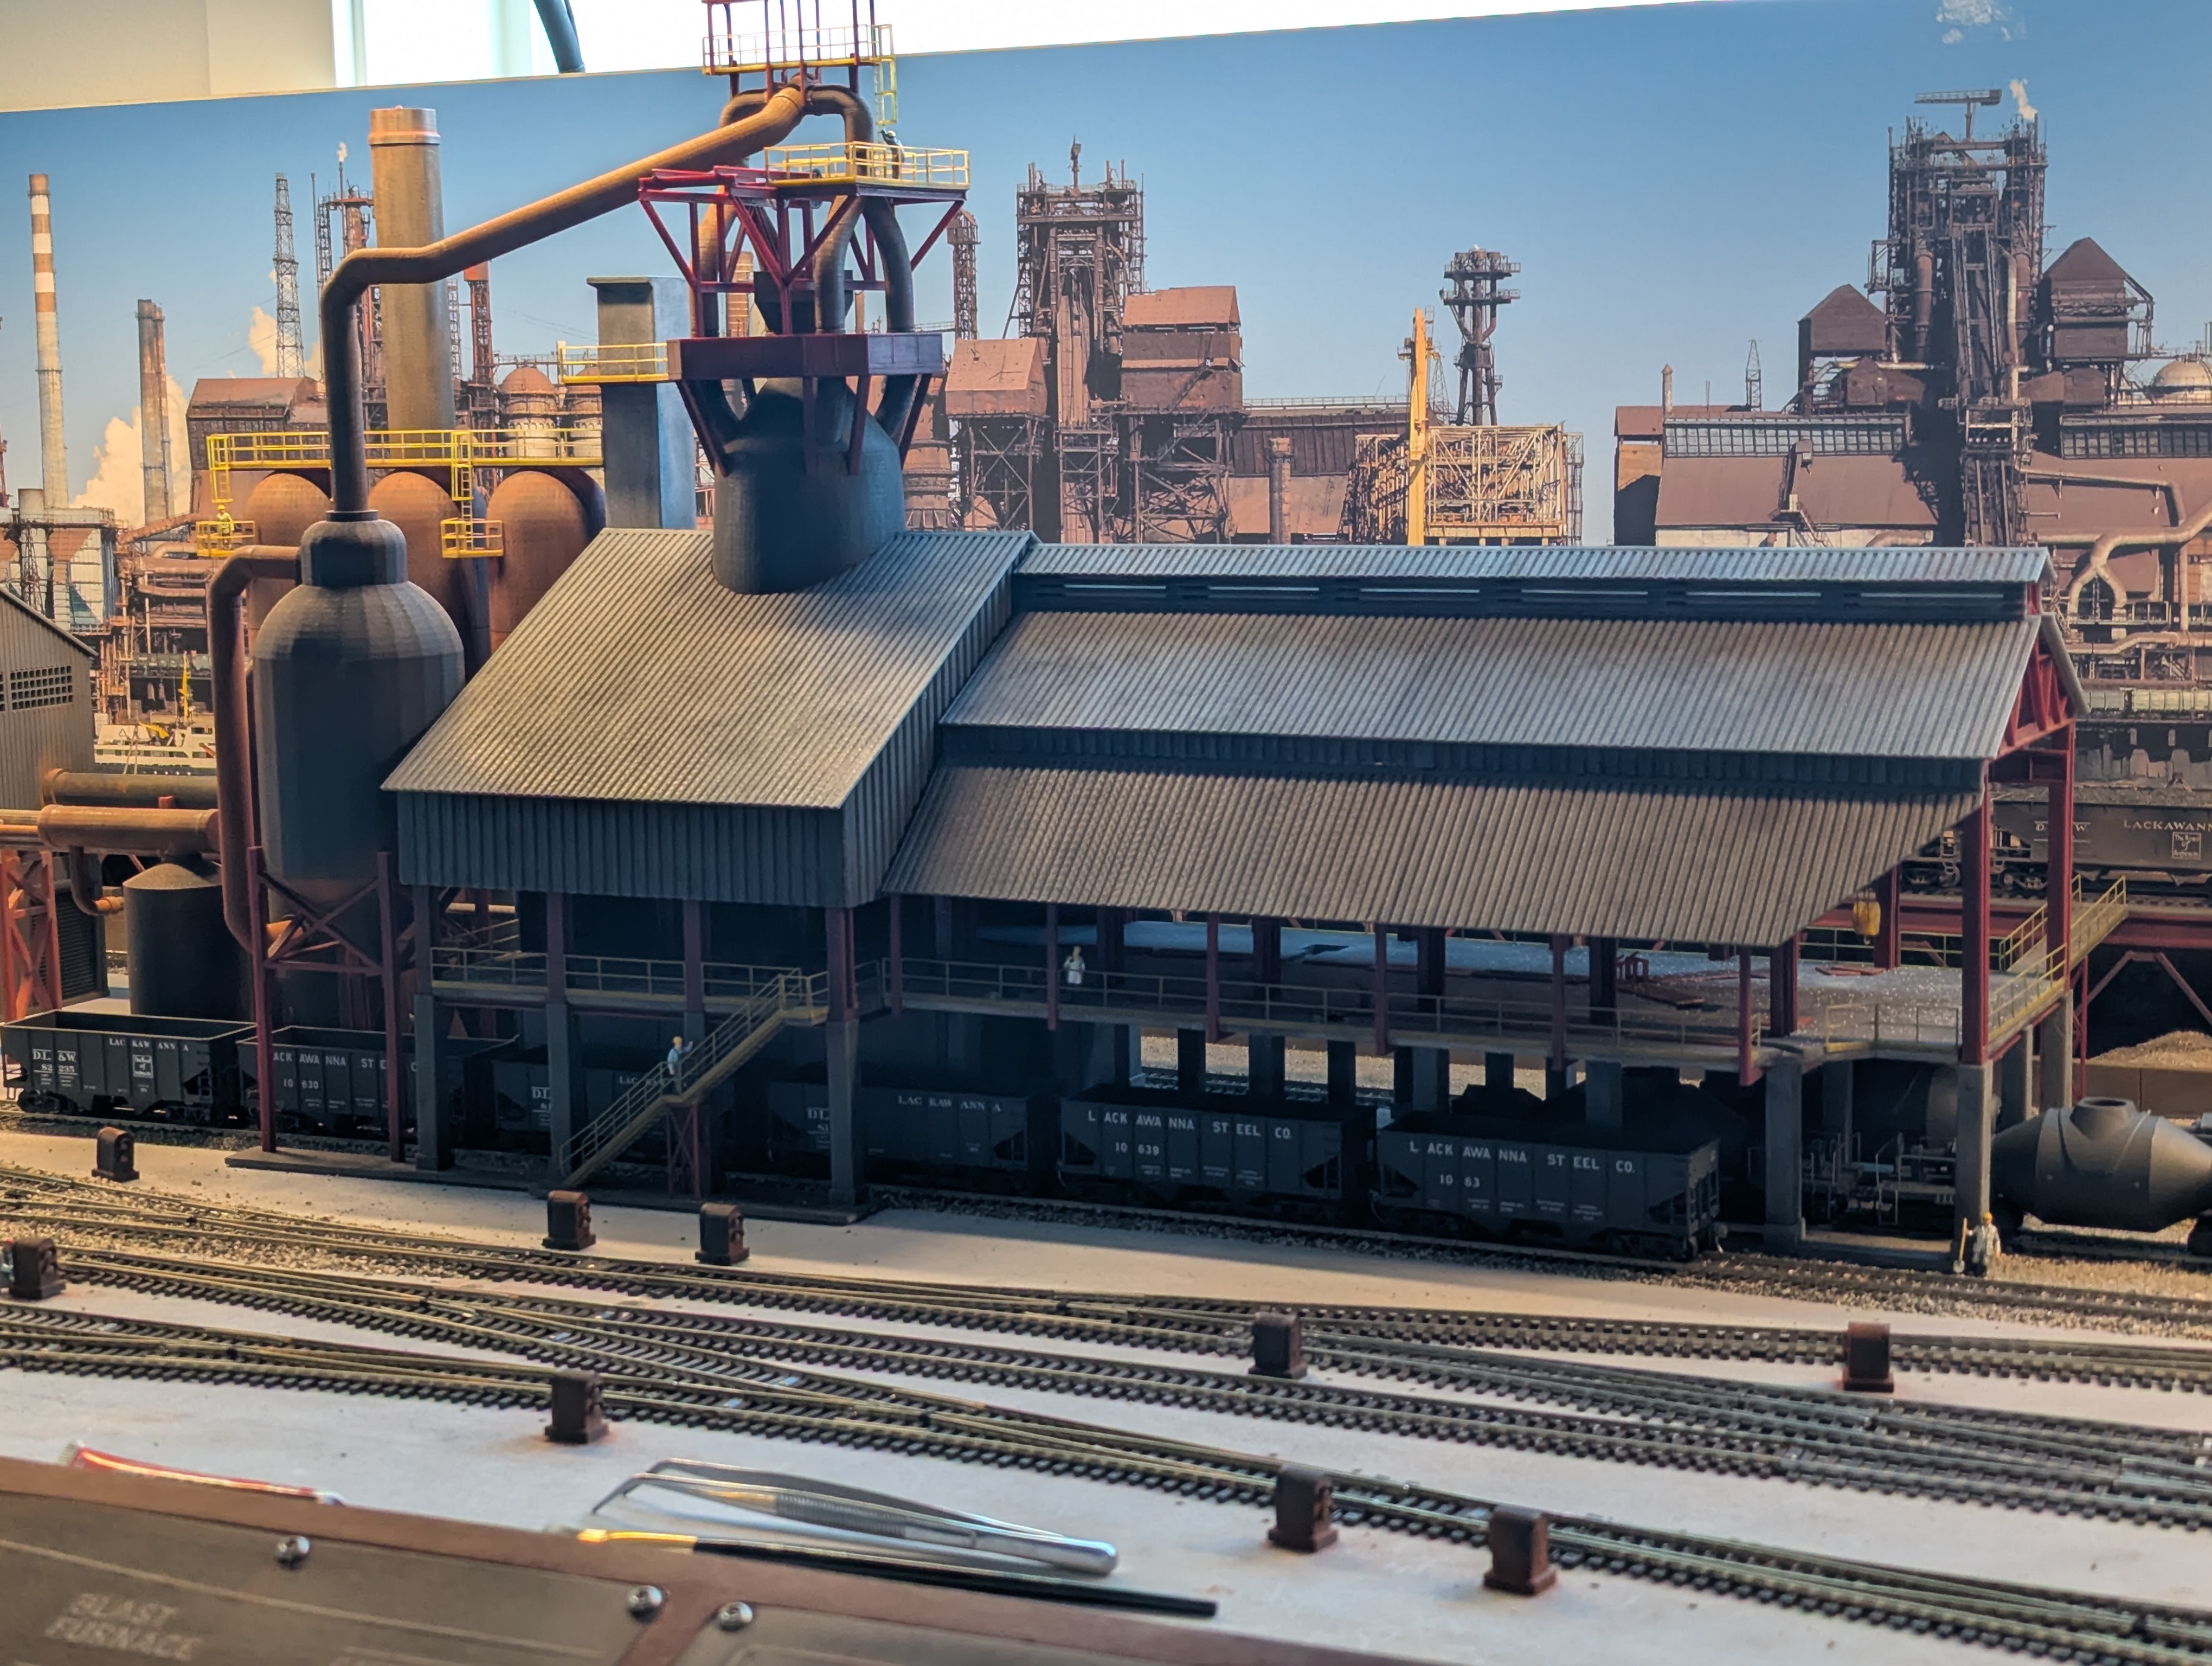
INTRODUCTION Edit 6/2/26: New photo of the furnace on my layout that is finally underway! Edit 5/1/25: Added the Google Sketchup file so folks can see the individual pieces and how they go together, sort of a half-assed instructional. Introducing for your viewing pleasure my version of the #3 blast furnace, known as “Jane”, at the Pittsburgh Steel Company, Monessen Works. I designed and modeled this using historical pictures and the HAER engineering drawings from the Library of Congress. Further inspiration and guidance for coming up with something actually achievable was taken from two discontinued Walthers blast furnace models (933-2973 and 933-4600). I was able to hunt up the assembly instructions and various photos of these models to help me work out spatial relationships and whatnot, as well as a general feel for what the overall size of the model needed to be, roughly. There was A LOT of poetic license taken here, so if you're an old steel worker or engineering buff, please don't waste your time busting my balls because it's not 100% historically accurate. This structure was designed to be the centerpiece of a small HO scale switching layout I am currently building so I had to take lots of issues into account, available space being the primary concern. Anyway, I think it came out pretty amazing and I am super happy with the result. I am still working on some additional micro-details (access ladder for the stack, bleeder/explosion valves, interior equipment, etc.) but this is 99% complete so I wanted to get this up for now and I can add the frills later. BEFORE YOU READ ANY FURTHER A word of warning it you think you want to take this on; I tracked the details for this entire model and there are 397 parts using a little over 3KG of filament and the overall print time is ~171 hours. The 171 hours assumes you use the 3MF files I've included (there are 119 of them) where I've plated certain batches of similar parts together. If you were to print the parts individually the print time would be WAY more. Also, I don't have any detailed assembly instructions made up but the part names are reasonably self explanatory. I am pretty sure I will be the only one who ever prints this so I didn't take a bunch of my time to make instructions, but if anyone seriously wants to take it on I can come up with something, just let me know. THE BASICS The model is broken up into 3 major sections: the Cast House (the right third), the Furnace (the center third) and the Stoves (the left third). The parts for each section are segregated into appropriately labeled folders. As mentioned above, I have plated most of the STL files together with similar parts to cut down on the printing time and also so various parts can share specific print settings. The larger parts are all printed with a 0.40 nozzle and 0.20 layers, but most of the smaller detailing parts (railings for instance) are printed with a 0.25 nozzle and layers all the way down to 0.05. The best way to not have to worry about figuring out the print settings is to stick with the 3MF files, which also address things like brims and supports, where needed. You can certainly change the filament types as you see fit; I used what I had in the colors that I wanted without regard to whether it was PLA or PETG. Lately I've been using a lot more PETG because in my experience the prints are more reliable on the textured plate. YMMV I included the spreadsheet where I tracked the print metrics, and that sheet includes all of the various print settings, filament types, nozzle/layer heights as well as colors used and which parts were plated together.


💬Baskı İncelemeleri & Yorumlar(0)
★4.9 / 5.0· Başarılı Baskı