


Solar System Lithophane Planet Lamps - ⌀150mm
Download, slice and print this model in the MakerSpell app — available on Android and Windows. Get the app
Model Overview & Print Notes
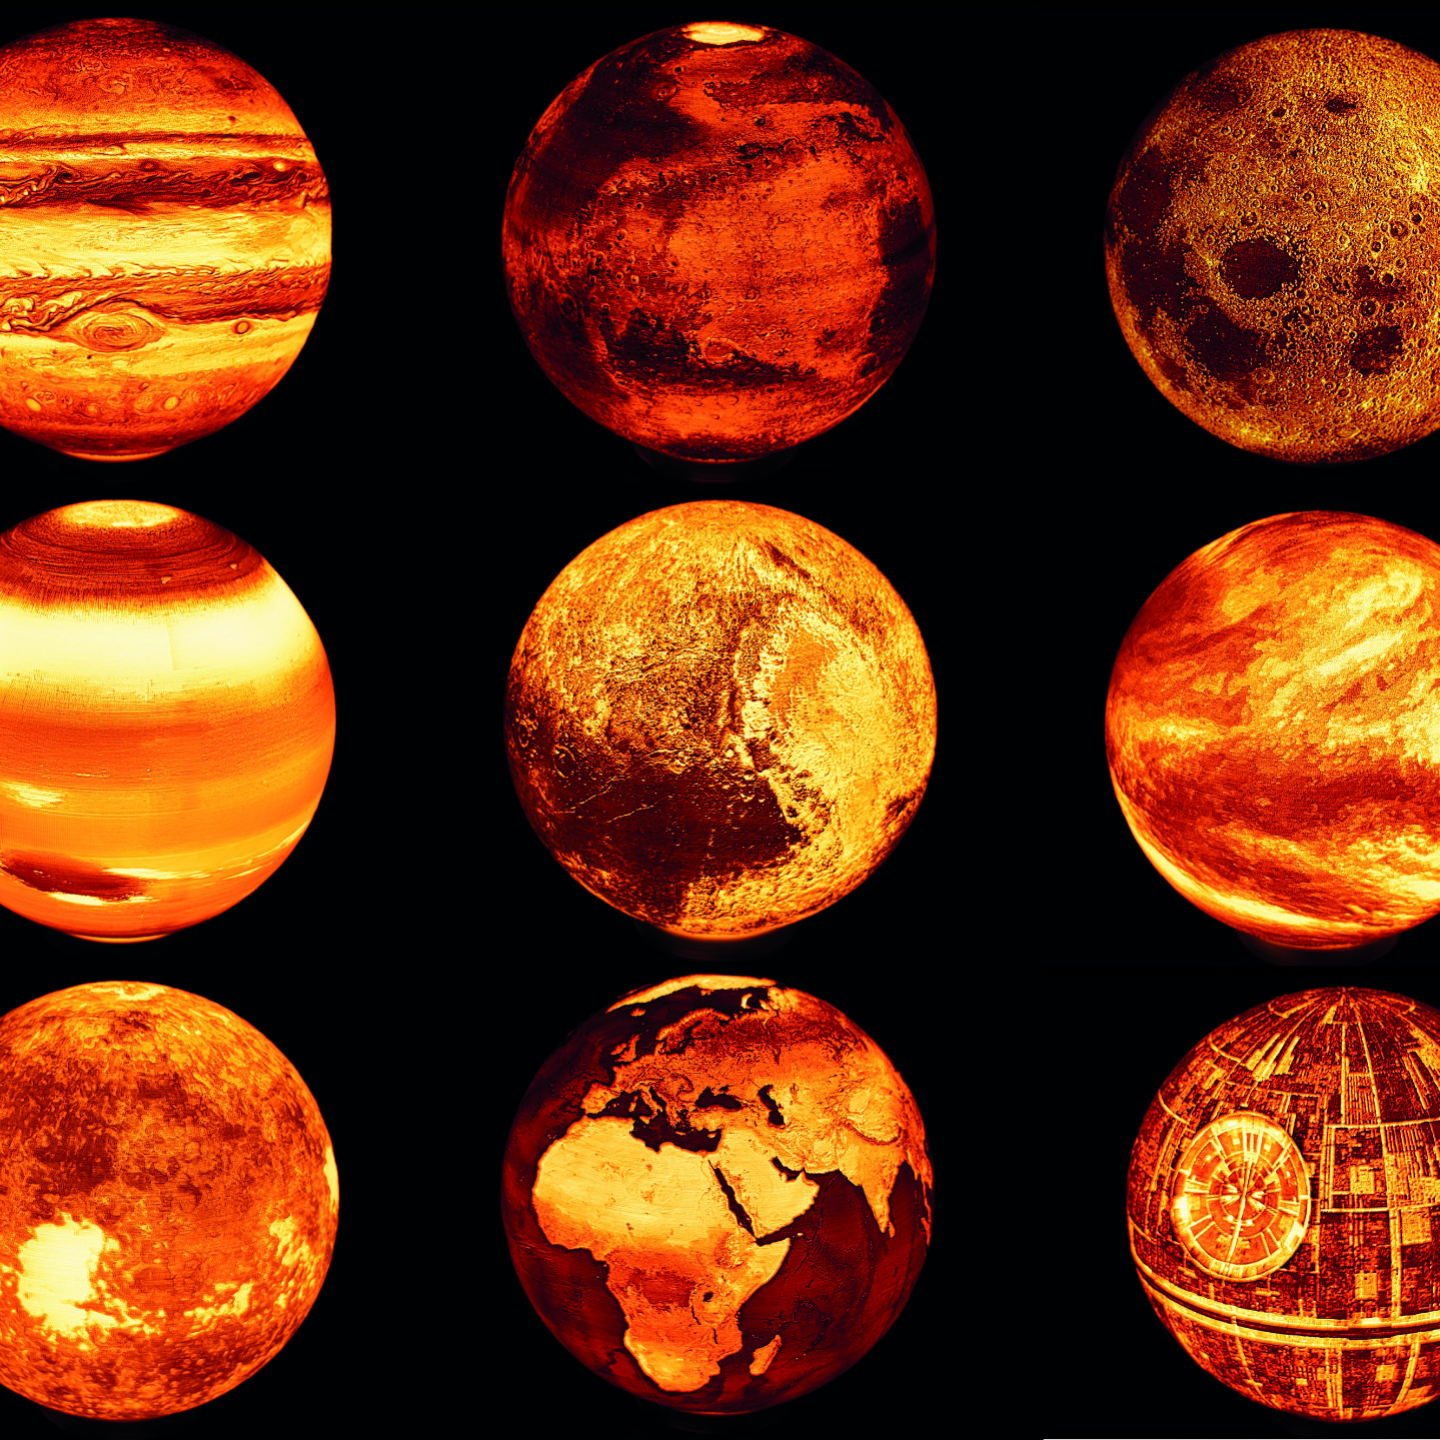
Boost Me If you like my models, please consider boosting me. This really helps me a lot to mitigate the design and development costs of these models. Attention This upload does not contain any STL files. Due to the upload size limitations of Maker World and the large file sizes for high quality lithophane STL's (200-300MB each), I can only provide print profiles containing the STL files. Introduction This model is part of my Solar System Lithophane Lamp Series. As of now, all planets and several moons of the solar system are available as lithophane lamps and in three different sizes: ⌀205mm , ⌀150mm (this upload) and ⌀75mm . I am already working on a ⌀295mm version for large scale printers such as the H2D and a ⌀25mm version for 0.2mm nozzles and Resin printers. If you like my work, please consider supporting me. Your support will help me to make more models available for free. https://ko-fi.com/fritzpeppone . If you like to use my models commercially, please obtain a commercial license on Makerworld. The commercial license includes all of my models except those that are based on the intellectual property of others (e.g. the GTA V map lamps) or remixes (e.g. the Death Star or Phobos lamps). Membership Become a member to use my models commercially! Requirements All Lamps have a size of ~ 150mm x 150mm x 140mm. They should print fine on any printer. You will need around 150g of Filament (preferably PLA or PLA+) per lamp. The lamps are mounted to their base with a M50x3 metric thread. The idea for the thread is taken from the Lithophane Moon Lamp with wide Screw Base by The Quicksilver . I am providing multiple different base options that all use the same thread. Choose the lamp of your liking and match it with any lamp base of your liking. Currently, you have two base options to choose from, both using the Bambu LED Lamp Kit 001. Print Settings There are only a few settings you should tweak in the slicer to print the lamps. Print in PLA or PLA+ Recommended layer height: 0.12mm Use the Arachne Perimeter Generator for more precise printing with better details If you use Arachne, set the minimum line width to 75% to avoid holes! Set wall count to 7-8 to obtain a solid lamp Set number of top layers to 10 Set seam position to aligned If necessary, ctivate Brim (Outer Brim Only) and set the Brim width to 5-10 mm No Support required! The lamps print perfectly fine without support. All lamp bases come with in-built snap off supports (where required). Be aware, that slicing and printing may take a very long time. The STL files can take up to 10 min. to slice. For Bambu Studio users: Bambu Studio seems to struggle with the Arachne Perimeter Generator. If you are unable to slice a lamp with Arachne, use the Classic Perimeter Generator. This is not a SpeedBoatRace print! Use conservative print speed settings to avoid artefacts! It's totally fine if your print takes one or two days to finish. Filament Filament matters. A lot! Depending on your filament choice, your lamp may have more or less contrast or a warmer or cooler color temperature. You can also change the outcome by choosing light sources with different wattage or color temperature. The picture below illustrates this: All of the four Panels above were printed with different white PLA/PLA+ filaments but illuminated with the same 1W LED bulb. Before starting a multi-day print, I recommend printing the Solar System Lithophane Calibration Panel to test how your print will turn out. You are also by no means limited to white lights and filaments. Check the makes below to get inspired what color and light choices other makers made. My personal favourite filament and the one I used for all lamps in my photos is Filament PM PLA+ White. Planet Lamps The list below contains all (Dwarf)Planets of the solar system and the sun, turned into lithophane lamps. All of the lamps below are original creations. There are versions with the thread at the south pole (for standing use) and upside down versions (USD) with the thread at the north pole (for hanging use). The Sun Mercury Venus Atmosphere Venus Surface Earth Earth Bathymetry Earth Fishworld Earth Political Earth Political Bathymetry Earth Topography Mars Jupiter Saturn Uranus Neptune Pluto Moon Lamps The list below contains several moons of the solar system, turned into lithophane lamps. All of the lamps below are original creations. There are versions with the thread at the south pole (for standing use) and upside down versions (USD) with the thread at the north pole (for hanging use). The Moon Io Callisto Europa Ganymede Other Lamps The category "other Lamps" so far only contains two models. Universe Expansion, shows a model of the big bang, as extrapolated by cosmic background radiation. The idea for this model was suggested by Printables user Markus and is based on image data by ESA, showing the cosmic microwave background of our universe . The Death Star lamp a direct remix of Olivier Popiers Starwars deathstar lithophane lamp . I scaled it down to 150mm diameter while maintaining the wall thickness. Additionally, I added the M50 thread and an indentation for the ray. Death Star Universe Expansion Lamp Bases Printing the Planet or Moon of your choice is only a part of creating your own lamp. You'll also need a Lamp Base to illuminate your Planet or Moon. I am providing several different Lamp Bases, all with a matching M50x3 thread. All of the Bases below will work for all of the Planets and Moons. Some lamp bases may use snap-off support . The supports look like small ring segments, tabs or cylinders that should be removable with very little force and should leave you with a good surface. They are only tested with PLA/PLA+ filament. Using other filaments may make support removal more difficult. Also your layer height should not exceed 0.2mm as this is the separation distance of the support objects. Bambu Base Simple and easy illumination option. You can get the LED Kit on the BambuLab Shop. BOM: 1x LED Lamp Kit 001 - via BambuLab Printed Parts: 1x Bambu Base 1x Base Bar Assembly: Insert the LED Lamp from the bottom into the printed base and push the wire into it's channel Use the bar and screw it to the bottom of the lamp with the two screws that came with the LED Connect the base to the planet or moon of your choice Rock Base This lamp base is based on the High Quality Rocks Asset by P_4_N_D_A . Simple and easy illumination option. You can get the LED Kit on the BambuLab Shop. BOM: 1x LED Lamp Kit 001 - via BambuLab Printed Parts: 1x Rock Base 1x Base Bar Assembly: Insert the LED Lamp from the bottom into the printed base and push the wire into it's channel Use the bar and screw it to the bottom of the lamp with the two screws that came with the LED Connect the base to the planet or moon of your choice E14 Puck Base A bit more involved, requires you to wire mains voltage and to use heat set inserts. More flexible, since you can use all sorts of bulbs. BOM: 1x E14 lamp socket with M28x2 thread, no strain relief - available at (european) hardware stores 1x Lamp wire with switch, 2x 0.75mm² - available at hardware stores 4x M3 threaded inserts 4x M3x8 BHCS screws 1x E14 LED Bulb Printed Parts: 1x Puck Base E14 1x Puck Base E14 Lid Assembly: Insert the 4 heat set inserts into the Puck Base E14 Screw in the E14 lamp socket from the top Connect the lamp wire to the socket. Use ferrules! Wind the cable through the base to ensure strain relief. You may also use a zip tie (optional). The zip tie has to be very small. Guide the cable out of the base and screw the lid on Connect the base to the planet or moon of your choice E14 Adapter This is a simple, yet effective adapter, allowing you to mount the lamps to any lamp base that uses E14 sockets. The possibilities are endless. BOM: 1x Lamp with threaded E14 - some Ikea examples: a ceiling mount , a metal lamp base , a large lamp base and this pretty cheap base . The adapter is by no means limited to Ikea lamps. They just happen to be the lamps that I have at home and I could test the Adapter with. Just make sure that the thread diameter of your lamp is ~28mm (E14) and you should be good. 1x E14 LED Bulb Printed Parts: 1x 0E14_adapter Assembly: Screw the adapter on the E14 socket and secure it with a nut Other Models There is also a smaller version and a larger version of this Lamp Collection available: the Solar System Lithophane Planet Lamps - ⌀75mm and the Solar System Lithophane Planet Lamps - ⌀205mm . Another rather new project have been working on are the Minimalist City Map Lithophane Lamps . Check it out! Acknowledgements A big shoutout and thanks to: moonournation : to my knowledge, the Lithophane Moon Lamp OP, the original creator who came up with the idea. The QuickSilver : to my knowledge, the first person to add a thread to the moon lamp (I used the same diameter). Olivier Popiers : The creator of the Death Star Lamp I remixed. P_4_N_D_A : creator of the high quality rock asset I used to create the rock base Changelog 06.04.2025: initial upload 21.04.2025: License change to CC-BY-NC-SA and addition of the Death Star 05.01.2026: addition of upside down (USD) versions of all lamps and an E14 adapter for ceiling mounting